

You can always rent a recording studio, but it can be expensive and inconvenient to transport your equipment there and back. If you’ve got the space for it, you can create your very own studio within your home or apartment. After you’ve cleared the space, the first thing you need to do is give the walls an acoustic treatment.
Among the variety of sound-absorbing materials available, acoustic foam products come highly recommended for their versatility, efficiency, and ease of installation. Before we get into how to install acoustic foam, let’s take a look at what it is and how your recording space will benefit from it.
Quick Navigation:
What Can Acoustic Foam Do for You?
When properly installed, acoustic foam improves a room’s sound balance by eliminating residual sound. The residual sound is canceled out by the foam’s sound-absorbing properties, which in turn enhances sound quality in that room.
When sound is generated in a room, it can travel through structures such as floors and walls. Installing acoustic foam on a structure greatly reduces the amount of sound that can escape through or bounce off that structure.
Instead of traveling through the material, the sound will be absorbed by the acoustic foam, reducing background noise. This enhances speech, music, or any other audio being transmitted within that room.
In a sound recording studio or other room where minimizing sound interference is crucial, it’s important to dampen sound reflections. If not, the reflections will be recorded alongside the intended audio, creating an echo that compromises the quality of the recording.
Installing acoustic foam absorbs the reflected sound, and all that is left to hear is the sound direct from the source. This is exactly what you want in a studio – crystal clear sound quality. However, getting the best out of installing acoustic foam isn’t simply about setting it up; how you hang it also matters.
How to Install Acoustic Foam
For the acoustic foam to work effectively, it has to be strategically installed. If it is improperly installed on a wall, ceiling, or floor, sound resonance within that room won’t be sufficiently reduced.
There are a variety of ways to hang acoustic foam to get the desired results. The best way to install it will depend on your goals regarding sound quality, the type of surface it will cover, and other factors.
For example, if you plan on installing the acoustic foam on drywall or some other smooth surface, you can use a strong double-sided tape, push pins, or spray adhesive to hold the foam panels in place. Spray adhesive is a particularly common method of installing acoustic foam panels because it’s convenient, cost-effective, and quick.
Using Spray Adhesive to Install Acoustic Foam
Spray adhesive works best on smooth surfaces; textured surfaces like wallpaper won’t hold the panels. Most people spray the adhesive onto a backer material like cardboard or thin engineered wood. That allows you to mount the board and not apply adhesive directly onto the wall (and ruining your walls!)
- Mark the parts of the wall, floor, or other surfaces you want to cover with masking tape or a pencil.
- The surface must be thoroughly cleaned with isopropyl alcohol. If you don’t do this, the adhesive may not hold firmly.
- Wipe the cleaned area dry with a paper towel or dry cloth.
- Before applying the adhesive, make sure the temperature in the room is around 70° This is the optimal temperature for the adhesive
- Apply the spray adhesive to the acoustic foam’s back and the area the foam will cover.
- Wait at least 10 seconds for the adhesive to set.
- Lay the acoustic panel against the installation spot, then firmly press on it for about 30 seconds.
Repeat with more acoustic panels until you have completely covered the desired surface. For a long-lasting installation, maintain the temperature of the room at 70 degrees for two days.
Best spray adhesives for acoustic foam:
- 3M Hi-Strength 90
- 3M Super 77
- Auralex Acoustics Foamtak
Using Adhesive Squares to Install Acoustic Foam
Adhesive squares are just as strong as spray and make less of a mess, though this process may be more time-consuming than using a spray adhesive.
- Using pencil or masking tape to mark the portion of the wall, floor, or other surfaces you intend to cover with the acoustic panel.
- Clean the surface with isopropyl alcohol and wipe dry.
- The adhesive square has paper liners on its front and back. Take the paper liner off one side of the square and attach the exposed side to the back of the acoustic panel.
- Attach the adhesive square to each corner on the back of the panel and along its outside edges. For a 1-inch panel, use two adhesive squares, three squares for a 2-inch panel, and four squares for a 3- or 4-inch panel.
- Remove the other paper liner of the adhesive square.
- Take the acoustic panel and place it on the spot you’ve marked for installation. Keep it in position and put pressure on it for at least 30 seconds.
Repeat the process until you’ve covered the desired surface with acoustic panels.
Alternatives to Adhesives
If your apartment, studio, or other space is a rental, using adhesives or push pins may not be a good idea, as you’ll leave behind either stubborn adhesive stains or pinholes.
To hang acoustic foam without damaging walls, the best option is 3M Command strips. Regardless of how long they’ve been installed, these strips peel off with ease and leave hardly any residue behind.
Another idea to avoid damaging walls is to attach your acoustic panels to a single thick cardboard or plywood board with adhesive. The board with the panels can then be leaned against or hung on the walls. This solution has the benefit of being mobile since you can move the boards around and even take them with you if you move.
Now that you know how to hang acoustic foam, the next question to answer is where to hang it for optimal results.
Where to Place Acoustic Foam
The best place for acoustic foam depends on your reason for using it. You can install it on the wall, floor, and/or ceiling, depending on the type of effect you’d like to create.
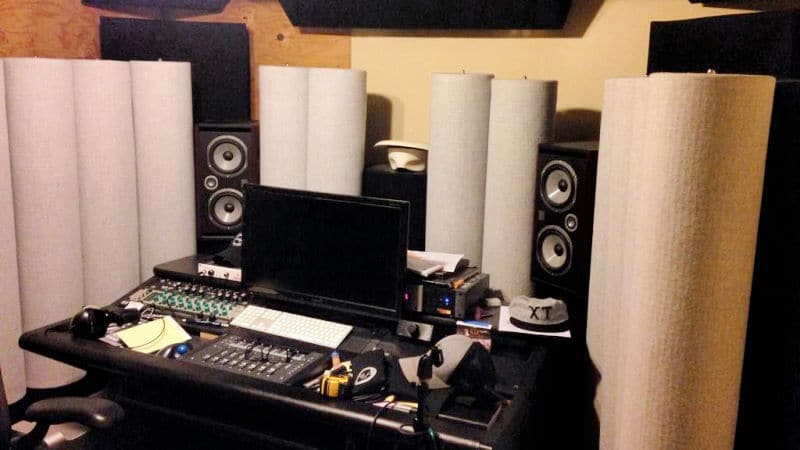
Some people install it directly behind their sound system to project the sound away from the wall. For example, within a home theater, church, or concert hall, the acoustic panel can be installed behind speakers, alongside a diffuser.
The foam will absorb sound reflections while the diffuser points the sound in a single direction. The proper combination of both absorption and diffusion maintains sound balance and amplifies sound quality.
Acoustic foam bass traps should be placed in the corners with primary low-frequency issues.
Recommended Acoustic Foam Products
Some people choose to use bass traps instead of acoustic foam to improve sound quality in a room. Compared to bass traps, however, acoustic foam is more flexible and covers more surface area with less material. Also, unlike bass traps, foam captures loose sound waves that travel between opposite parallel walls.
All of these and more make acoustic panels a good option when it comes to cost-effectively eliminating residual sound. Quality varies from acoustic panel to panel, so here are some of the best products currently on the market.
- Auralex Acoustics Studiofoam Wedges
– A highly-rated product with an NRC rating of 0.8. It’s 2 inches thick and is available as 12-by-12-inch panels. - Auralex Acoustics SonoFlat Absorption Foam – Another top quality product that shares similar dimensions with the Studiofoam Wedges, but the SonoFlat has a better NRC rating of 0.95.
- Auralex Acoustics Roominator Foam Kit – Another top choice from Auralex with similar dimensions, but with an NRC rating of 0.6 to 0.65.
- Pro Studio Acoustics Foam – Also 2 inches thick with 12-by-12-inch sides. It has a 0.65 NRC rating.
- Audimute AcoustiColor Tile – Available in a variety of colors, this 36-by-36-inch panel is 0.5 to 1.5 inches thick and has an NRC rating that ranges between 0.55 and 0.95.
An NRC (noise reduction coefficient) of 0 means a material is perfectly reflective. That is, it absorbs no sound. Instead, sound bounces off it. A product with an NRC rating of .95 means the material reflects 5% of the sound and absorbs 95%. It’s why the Auralex Acoustics products are the premium choice.
*Last updated 2026-06-16 at 18:40 / Product Links & Images from Amazon Product Advertising API


Leave a reply