
We are inundated with noise in this world. At work, at home, and in public places. Improving the acoustics in these places can reduce stress, increase productivity, and improve peoples’ overall experience.
Fortunately, there is a simple sound absorbing technology available called Acoustic Panels, that can improve the acoustics of almost any setting. Acoustic paneling can improve sound quality and clarity while reducing noise, echoing, and reverberation.
A common misconception is that sound absorbing panels will “soundproof” a room. This is not the case. While acoustical paneling will improve the quality of the acoustics and reduce noise in the space where they are installed, they do not reduce the amount of sound migrating from one room to another. If you wish to isolate a room from transmitting sound elsewhere, you should additionally consider installing soundproofing insulation into the walls.
Quick Navigation:
Common Applications
- Reduce the echo, din, and reverberation of peoples voices in large spaces such as museums, auditoriums, theaters, and halls.
- Improve the experience at crowded gathering places like bars and restaurants by preventing the chatter and din of voices.
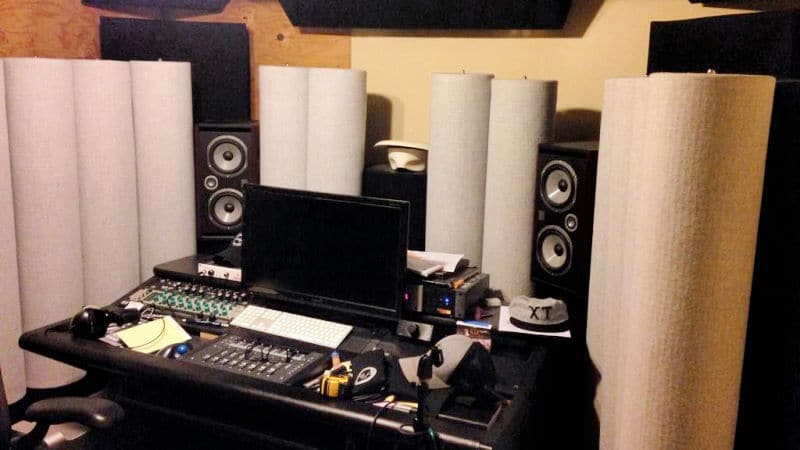
- Increase the clarity and accuracy of sound in listening places like recording studios and mixing rooms.
- Improve the accuracy and clarity of sound in home theaters that use surround sound systems for watching BluRay movies, video games, and sporting events.
Sound Absorbing Panels in Home Theaters
The most common application for acoustic foam panels in peoples homes is in the Home Theater. While many people spend top dollar on high definition televisions, surround sound speaker systems, and theater style furniture, they tend to neglect the acoustics of the theater room itself.
Many home theaters suffer from echoing, muddled voices, and booming explosions of bass. Homeowners may wonder why their new system doesn’t match the amazing quality from the electronics store display.
The reason for this is their home theater has not been acoustically tuned like the big box store showrooms have. You will be amazed at the difference in sound quality and clarity after strategic placement of some decorative sound absorbing panels and corner bass traps.
AcousticsFREQ has a fantastic guide on where to place acoustic panels in a home theater.The process uses a handheld mirror to identify each place where a speaker will reflect sound to each listening or viewing position. It’s really quite a simple (but genius) method to locate your sound absorbing panels.
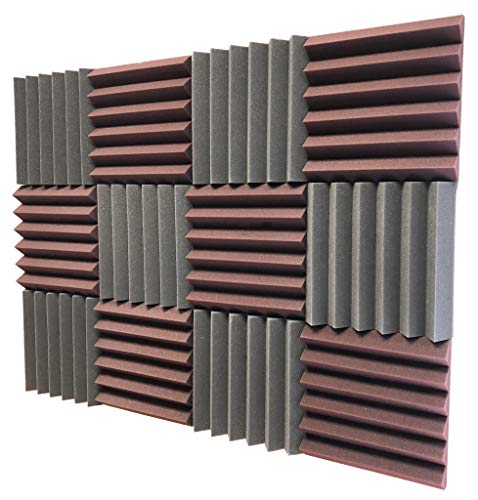
Here are some of the most visually pleasing acoustic panels available on Amazon.


Industrial Acoustic Panels
Industrial and commercial sound absorbing foam materials, while extremely effective, are rather expensive for most people, and are typically reserved for professional recording studios and high end theaters.
Another commercially available material is decorative acoustic wood. Acoustic wood is a much more attractive material, making it popular in the design of modern work spaces, and in public places like museums. Below is a photo of Union Pacific Harriman Dispatching Center.
Notice the acoustic wood paneling on the ceilings, and the fabric covered sound absorbing panels on the walls.
These state of the art materials can drastically cut down the ambient noise levels, no doubt an important consideration in a place where communication is critical.

photo credit: americaspower via cc
Sound Absorbing Panels in the Workplace
There are so many distracting noises at places of work; clacking keyboards, ringing phones, whirring printers, and the annoying guy jabbering on at the water cooler. It can make for a toxic mix for anyone who values their attention, concentration, and productivity.
Rather than retreat to a pair of noise-canceling headphones, there are some products commercially available that can take all that ambient noise down a few levels. If you’re lucky, you might work in a modern building with acoustic wood paneling on the walls and ceiling, like the Union Pacific center we previously discussed.
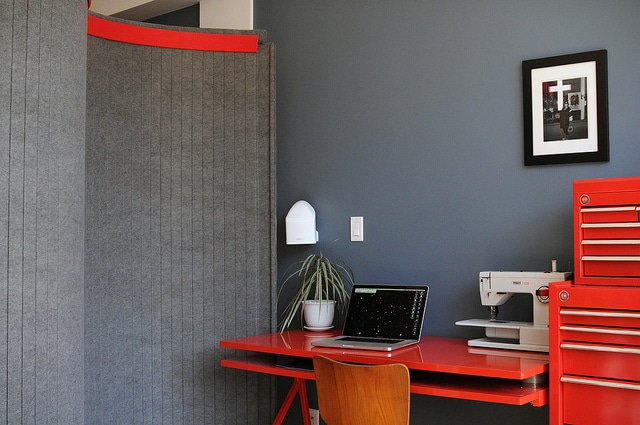
If not, there are new workspace innovations like sounds absorbing workspace dividers. They are movable and customizable panels covered in a decorative sound absorbing material.
Making Your Own Acoustic Panels
Yes, there are options to buy finished acoustic panels, but you can make your own panels for your home theater or home studio.
But by making them yourself, you can save a little bit of money, while customizing the size and appearance to fit your home decor.
For around $100 or less you can make a set of 6 panels that will dramatically improve the acoustics in your home.
Adding acoustic panels can make a dramatic improvement in the sound quality to your home theater or home studio.
While you can purchase pre-made acoustic panels, many people want to know how to make their own.
Not only can you save some money by doing it yourself, but you can custom design the panels to match the size, shape, and decor of your home studio or home theater.
This guide will lead you through making your own set of 6 framed, fabric covered acoustic panels.
Tools You Will Need
- Chop Saw or Hand Saw with a Miter Box (to squarely cut the frame pieces).
- Electric Drill and Drill Bits (to drill pilot holes in the frame, and drive in the screws).
- Tape Measure and Pencil (measure the frame piece lengths).
- Staple Gun with Staples (to attach the fabric to the frame).
- Carving Knife (to cut the insulation to size, if necessary).
Materials Needed for the Acoustic Panels
The first and most important item you will need is the core sound absorbing material. There are a few manufacturers and types of material we recommend. Each of these come in packs of 6 panels, size 24×48 inches, and 2 inches thick. This works out well, because if you build all 6 acoustic panels, you will get great results in your home theater or studio.
- ATS Acoustics Rigid Fiberglass Board, 2 inch, Case of 6
- Owens Corning 703 Semi Rigid Fiberglass Board Sound Absorbing Thermal Acoustic Insulation, 2 Inch...
- Roxul Acoustical Fire Batts, Mineral Wool, 2-inch, Case of 6
Next, you need to buy the wood frame materials. If you want a flat, square looking panel you should buy 1″x3″ boards. If you want a rounded edge effect, you should buy 1″x2″ boards. You will be cutting these boards into 24″ and 49-3/8″ lengths, so if you are building all 6 panels, you should buy twelve 8 foot boards.
Other Materials
- Box of small wood screws for the frame. #6 x 1-1/4 Inch Zinc-Plated Steel Flat-Head Phillips Wood Screws, 100-Count.
- Corner brackets.
- Can of spray adhesive (to glue the panel edges to the frame). Elmer’s E455 Extra Strong Spray Adhesive 13.5-Ounce.
- Bottle of wood glue (to glue the frame ends together). Franklin International 5063 Titebond Original Wood Glue, 8-Ounce.
- Picture hanger hardware. 20 lb Picture Hangers, Set of 20 (20 Hangers & 20 Nails) or 100 Heavy Duty Single Hole D Ring / Triangle Strap Hanger w/ Screws.
The last important item is choosing a fabric to cover the panels with. Any good craft store will have a good selection of fabric designs to choose from. Just be sure to pick something of high quality. The rule of thumb is you should not be able to see through the fabric, and that it is breathable.
If you can put your mouth up to the fabric and breathe through it, that means the sound waves will be able to also pass through to the sound insulation. Buy a 20 foot roll of 62 inch fabric, which is enough to cover 6 full size panels.
Step 1: Build the Panel Frame
Set up your saw of choice onto a sturdy bench. Measure and cut each 8ft board into 24″ and 49-3/8″ pieces. This will give you 12 top boards, and 12 side boards to make 6 panel frames.
Lay your boards on the bench and line up the acoustic insulation panel inside. If you are using the corner brackets, push those into place and mark the screw hole locations with a pencil. If you are screwing into the ends of the boards, mark two places for screw pilot holes.
Drill the pilot holes with a drill bit that is slightly smaller than the screw. This will help prevent the ends of the boards from splitting.
Place a few drops of wood glue at the joints, and then screw the pieces together.
Next take the can of spray adhesive, and spray along the outer edges of the insulation panel. Then firmly seat the insulation into the frame. Let this cure for 24 hours, and you will have a nice
Step 2: Prepare the Panel Fabric
Cut the fabric into 66″ long pieces. Lay the fabric face down on your bench, then lay down your panel frame in the center.
Starting on a long side, spray some adhesive onto the back of the insulation, and fold the fabric over, pressing down onto the adhesive. Then staple the fabric to the frame every 3 or 4 inches.
Now on the opposite side, apply more adhesive on the back, and tightly stretch the fabric around and staple to the frame.
All that is left now are the top and bottom ends of fabric. Repeat the gluing and stapling process on the ends. The fabric should be neatly folded, almost like you would wrapping a gift.
The end result should leave you with an appealing acoustic panel, with no wrinkles on the front.
Step 3: Hang Your Panels
Screw two D hangers into the back of the frame, and then hang the frame onto nails or picture frame hangers.
Please use common sense when mounting your acoustic panels. Make sure the panels are secure and won’t fall, especially if they are mounted high on a wall or on the ceiling.
Video Guide to DIY Acoustic Panels
If you are a more visual learner, this short video does a nice job showing how all the pieces come together.
*Last updated 2026-07-10 at 17:38 / Product Links & Images from Amazon Product Advertising API


Creating the acoustic panels is not hassle free, but it has its benefits. One they become really affordable and the second, they can be customized the way wanted to compliment the home décor.
When choosing a transparent acoustic fabric, find a fabric that is designed for that purpose, if you are buying the fabric from a store like Fabricland. pick up the fabric and breathe through it, to check for acoustic transparency.
Thanks Josh
Do you have to build a wood frame around the panel? What happens if you don’t?
The wood frame is just meant to give the insulation some structure and allow more appealing looking fabric to be wrapped over it. It will just look raw without it. Or you can get the acoustic foam, like Auralex and not mess with the DIY style.
I purchased speaker fabric from fabric land… a lot of it but I am worried about the the fibergalce or the rock wool gettin into the the air. Should this be a concern?
It’s just a minimal concern as far as I know. Once it’s covered with fabric, there shouldn’t be anything getting in the air. Some fibers may go airborne while cutting a piece of rockwool to size, so do it in the garage or outside if possible. If you have more concerns, I would contact Roxul (manufacturer of rockwool) with your questions.